
Introduction to Pressure Cooking
Pressure cooking has emerged as a modern-day culinary marvel, enabling home cooks and professional chefs alike to prepare intricate dishes with remarkable efficiency. Central to its appeal is the substantial reduction in cooking time, seamlessly transforming labor-intensive recipes into manageable feats. Notably, the method involves cooking food under high pressure, which raises the boiling point of water, thus accelerating the cooking process and yielding tender, flavorful results. For instance, a 3 lb roast, which traditionally requires several hours in a conventional oven, can be prepared in a fraction of the time using a pressure cooker.
Beyond mere convenience, pressure cooking offers additional benefits revolving around enhanced flavor and superior nutrient retention. By cooking food in an enclosed environment, flavors are concentrated, rendering dishes more robust and aromatic. Moreover, the rapid cooking time means that vital nutrients, which are often lost in prolonged cooking processes, are better preserved, ensuring that meals are not only delicious but also nutritious.
This guide aims to demystify the nuances of using a pressure cooker to prepare a 3 lb roast. Whether you’re a novice cook or a seasoned culinary enthusiast, our comprehensive insights will equip you with the knowledge needed to achieve a perfectly cooked roast. By exploring professional tips and expert recommendations, you can maximize the potential of your pressure cooker and elevate your home’s dining experiences.
Choosing the Right Pressure Cooker
When endeavoring to cook a 3 lb roast in a pressure cooker, selecting the appropriate device is paramount. Pressure cookers come in two primary variants: stovetop and electric. Each type has distinct advantages that cater to different culinary needs and preferences. Stovetop models generally offer higher pressure levels, which can reduce cooking times. They are also typically more durable as they lack electronic components. Electric models, on the other hand, provide convenience and user-friendly features such as preset cooking programs, timers, and safety mechanisms that automatically regulate pressure.
One of the most crucial aspects to consider when choosing a pressure cooker is its size. A 6 to 8-quart pressure cooker is often recommended for cooking roasts, offering ample space for the 3 lb roast and additional ingredients. Larger models can be useful for bigger families or those who enjoy meal prepping, while smaller models might be insufficient for such tasks.
Safety features are another critical consideration. Modern pressure cookers, particularly electric ones, are equipped with advanced safety mechanisms, including locking lids, pressure release valves, and temperature sensors. These features are designed to prevent accidents and ensure the cooking process is both safe and efficient. Ease of use is also paramount; look for models with intuitive interfaces and clear instructions for operation.
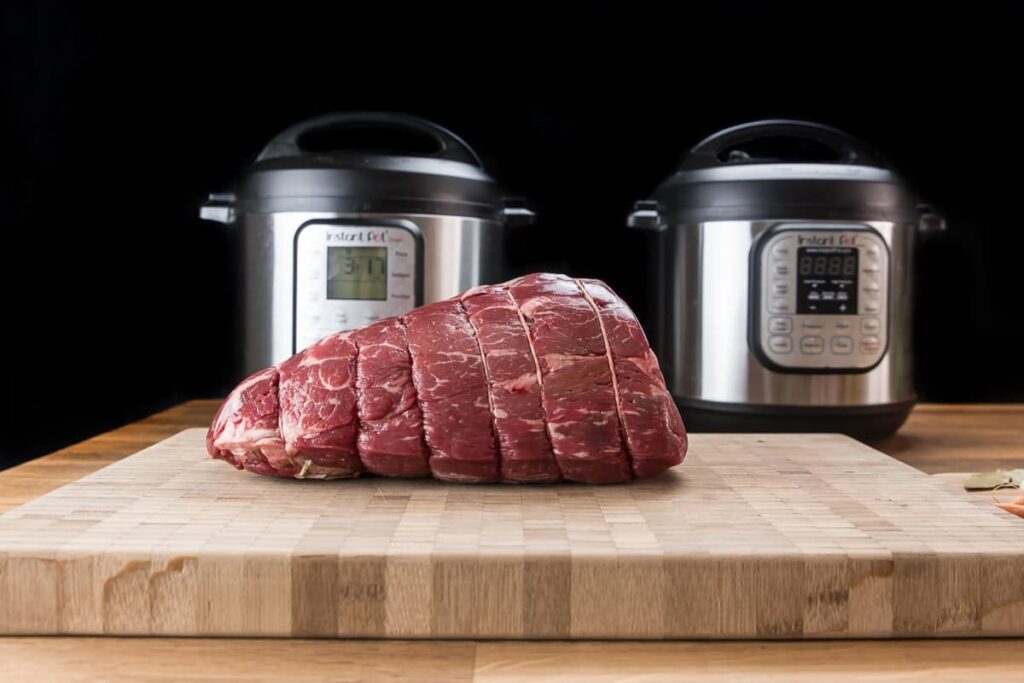
Some popular brands and models well-suited for cooking roasts include the Instant Pot series, renowned for their multifunctionality and user-friendly design, and the Fagor range, lauded for their high-quality and durable stovetop models. Other notable mentions are the Breville Fast Slow Pro, which offers precise control over cooking pressure and time, and the T-fal Clipso, known for its ease of usage and safety features.
By carefully considering the type, size, safety features, and brand reputation, you can select a pressure cooker that not only meets your culinary needs but also ensures your 3 lb roast is cooked to perfection.
Preparing the Roast
Preparing a 3 lb roast for pressure cooking involves several critical steps that set the foundation for a flavorful and tender result. Begin by selecting the right cut of meat. For pressure cooking, cuts like chuck roast, brisket, or round roast work particularly well due to their ability to remain moist and tender under high-pressure conditions. Once you have chosen your cut, carefully trim any excess fat. While a small amount of fat can enhance flavor, too much can result in a greasy roast.
Seasoning the roast is where you can infuse your personal culinary touch. A simple rub of salt, pepper, garlic powder, and onion powder is a good start. Intensify the flavor by adding fresh herbs like rosemary or thyme, which pair beautifully with roast beef. For a deeper, more complex flavor profile, consider marinating the meat. A basic marinade might include olive oil, soy sauce, Worcestershire sauce, minced garlic, and a splash of red wine or balsamic vinegar. Allow the roast to marinate for at least a few hours, or for a more intense infusion, let it marinate overnight in the refrigerator.
Another approach to enhancing the flavor of your 3 lb roast is to consider global cuisine influences. For an Italian twist, include crushed tomatoes, basil, and oregano in the seasoning. A Mexican-inspired variation could involve cumin, chili powder, and lime juice. The selection of seasonings and marinades enables you to diversify the dish and customize it to your preferences or the palates of your guests.
By thoughtfully preparing your roast before it encounters the high-pressure environment of the pressure cooker, you lay the groundwork for a delectable meal. These preparatory steps ensure that your roast emerges not only perfectly tender and succulent but also bursting with nuanced flavors, ready to impress your dining companions.
When determining the cooking time for a 3 lb roast in a pressure cooker, several factors must be considered to ensure that the meat is cooked to perfection. Generally, a standard guideline is to cook the roast at high pressure for approximately 20-30 minutes per pound. This means a 3 lb roast would typically require about 60 to 90 minutes of cooking time. However, this time frame can vary depending on various elements that could influence the cooking process.
The type of meat cut significantly impacts cooking duration. For example, a chuck roast, which is a more marbled cut of beef, might need more time to break down the connective tissues compared to a leaner cut like a sirloin tip roast. Different cuts of meat can also alter the tenderness and flavor profile of the finished dish.
Another crucial factor to consider is the model of the pressure cooker being used. Modern electric pressure cookers, such as the Instant Pot, are equipped with pre-set cooking programs and advanced sensors that might expedite cooking times. In contrast, older or stovetop models may require more manual adjustments and could have varied cooking efficiencies. Therefore, it is essential to refer to the manufacturer’s guidelines for specific cooking times and settings.
Altitude also plays a role in determining optimal cooking times in a pressure cooker. At higher elevations, the atmospheric pressure is lower, which causes water to boil at a lower temperature. Consequently, cooking times may need to be increased to achieve the same level of doneness at higher altitudes.
Detailed Cooking Time Chart for 3 lb Roasts
- Chuck Roast: 75-90 minutes
- Brisket: 80-90 minutes
- Rump Roast: 70-80 minutes
- Sirloin Tip Roast: 60-70 minutes
- Pork Shoulder: 70-80 minutes
- Pork Loin: 60-70 minutes
- Leg of Lamb: 60-75 minutes
Utilizing these guidelines, and taking into account the type of roast, cooker model, and altitude, will help you navigate the culinary nuances of cooking a 3 lb roast in a pressure cooker. Properly calculating the cooking time ensures the meat is tender, juicy, and full of flavor.
Setting Up the Pressure Cooker
Setting up your pressure cooker correctly is crucial for achieving the perfect 3 lb roast. Start by ensuring your pressure cooker is clean and in proper working condition. Begin by adding the correct amount of liquid to the cooker; typically, 1 to 1.5 cups of water, broth, or another cooking liquid is adequate. The liquid is essential for generating the steam needed to build pressure and cook the roast efficiently.
Next, prepare your 3 lb roast by seasoning it according to your preferred recipe. Using a trivet or steamer basket can prevent the roast from resting directly on the bottom of the cooker, which could potentially cause burning. Place your roast on the trivet inside the pressure cooker, ensuring it is centered and not touching the sides of the pot.
Securing the lid properly is a critical step. Align the lid with the cooker’s base, ensuring the rubber gasket is intact and free of debris. Close the lid and turn it to lock it in place according to the manufacturer’s instructions. Check the pressure valve to confirm it is set to the correct position for pressure cooking. This might involve turning a dial or ensuring a lever is in the correct place.
Safety cannot be overstated when setting up your pressure cooker. Make sure to follow these tips to avoid potential hazards:
- Ensure the pressure release valve is not blocked.
- Regularly inspect the gasket for wear and tear, replacing it if necessary.
- Do not overfill the cooker; the maximum fill line should be observed to allow space for steam buildup.
- Never force the lid open while the cooker is still under pressure. Use the natural or quick release method to safely release the steam before opening.
By following these setup instructions, you can ensure a safe and successful cooking process for your 3 lb roast in the pressure cooker.
The Cooking Process
Cooking a 3 lb roast in a pressure cooker involves several crucial steps, ensuring both flavor and texture are optimal for your main dish. Begin by placing your seasoned roast into the pressure cooker along with your choice of liquids—broth, wine, or water with seasonings typically work well. Once all ingredients are inside, securely fasten the lid onto the pressure cooker, ensuring that the sealing ring is correctly positioned.
The first phase involves bringing the pressure cooker up to full pressure. This usually requires setting the cooker to the appropriate setting, often high pressure for meats like roast. The time to reach full pressure varies depending on your specific pressure cooker model, but it generally takes around 10-15 minutes. During this phase, it’s critical to monitor the venting valve to confirm it is set to ‘sealed’.
Once full pressure is achieved, adjust the heat to maintain this pressure level. For a 3 lb roast, maintaining high pressure for approximately 60-70 minutes is typically ideal to ensure thorough cooking. Throughout this cooking period, it’s essential to keep an eye on the pressure gauge and adjust the heat as necessary to prevent the pressure from fluctuating too much. This approach helps in ensuring even cooking and tenderizing of the meat.
Releasing the pressure safely is a critical step in the process. There are two main methods: natural release and quick-release. Natural release involves turning off the heat and letting the pressure drop gradually until the pressure indicator shows it’s safe to open, usually taking about 15-20 minutes. This method is particularly useful for preserving moisture in larger cuts of meat like a 3 lb roast. Quick-release, on the other hand, involves manually venting the pressure using the release valve. This is quicker, taking just a few minutes, and is useful when you need precision timing or to stop cooking immediately to avoid overcooking.
Throughout the cooking process, periodic monitoring and adjustments may be necessary. Ensuring the cooker maintains a consistent pressure and adjusting the heat as needed are key aspects to achieving a perfectly cooked roast. Whether you opt for a natural or quick-release method, following these steps will result in a tender, flavorful 3 lb roast cooked to perfection in your pressure cooker.
Post-Cooking Steps
Upon completing the cooking process, it is essential to focus on the post-cooking steps to ensure the 3 lb roast achieves optimal flavor and texture. First and foremost, carefully release the pressure from the pressure cooker. This can be done using either the natural release method, which involves allowing the pressure to subside gradually, or the quick release method, where the pressure valve is switched to release immediately. Exercise caution during this step to prevent any burns from the hot steam.
Once the pressure has been fully released, open the lid and check the roast for doneness. The internal temperature of a properly cooked beef roast should be around 145°F for medium-rare, 160°F for medium, and 170°F for well-done. Use a meat thermometer to measure the temperature at the thickest part of the roast. If the roast has not yet reached the desired temperature, reseal the pressure cooker and cook for additional time in short increments, checking periodically to avoid overcooking.
After confirming the roast is cooked to your preferred level of doneness, remove it from the pressure cooker. Allowing the roast to rest is a critical step in retaining its juices and enhancing its flavor. Place the roast on a cutting board and tent lightly with aluminum foil. Let it rest for at least 10-15 minutes before carving. This resting period allows the juices, which have risen to the surface during cooking, to redistribute throughout the meat, resulting in a more succulent and flavorful roast.
When carving the roast, use a sharp knife to slice against the grain. This means cutting the meat perpendicular to the direction of the muscle fibers, which makes each slice more tender and easier to chew. Serve the carved roast promptly, pairing it with your favorite side dishes, and enjoy the savory flavors achieved through careful post-cooking steps.
Serving and Storing the Roast
Once you’ve prepared your delicious 3 lb roast using a pressure cooker, serving and storing it properly is key to maximizing its quality and flavor. For an ideal meal, consider pairing the roast with complementary side dishes. Classic options such as mashed potatoes, steamed vegetables, and a side of gravy can enhance the savory notes of the pressure-cooked roast. For a lighter option, a fresh green salad or roasted seasonal vegetables provide a balanced and nutritious accompaniment.
Proper storage of leftover roast is crucial to maintain its taste and safety. Allow the roast to cool slightly before transferring it to airtight containers. To refrigerate, place the roast in a container within two hours of cooking and store it in the fridge for up to three to four days. For longer storage, consider freezing the roast. Cut it into portions and wrap each portion tightly in aluminum foil or plastic wrap. Place the wrapped portions into a resealable freezer bag, removing as much air as possible before sealing, and store them in the freezer for up to three months.
When it comes to reheating your pressure-cooked roast, doing so gently can help retain its moisture and flavor. If reheating on the stove, place the roast in a saucepan with a bit of broth or gravy and heat on low until warmed through. Alternatively, microwave the roast in short intervals, ensuring it is evenly heated without drying out. Covering the roast with a damp paper towel can also help maintain its moisture during the reheating process.
Leftovers open up a realm of culinary possibilities. Creative uses for leftover roast include incorporating it into sandwiches, tacos, or hearty stews. Shredded roast makes an excellent topping for salads or a filling for savory pies and pasties. These ideas not only add variety to your meals but also ensure that no part of your tasty 3 lb roast goes to waste.